Private Internet Access
Despite being considerably less expensive than many VPNs, Private Internet Access (PIA) provides an excellent VPN service to thousands of people around the world. PIA is one of the most popular VPNs on the planet.
They provide plenty of features and an excellent privacy policy, along with strong security.
Pricing and plans
As I mentioned, PIA is low cost. Like many VPN services, they provide a single service at different price points depending on how long you sign up for.
For a single month, the cost is $6.95, while six months is $35.95 ($5.99/ month), and a year’s subscription is $39.95 ($3.33/ month).
As for payment options, credit cards, PayPal, and Bitcoin are all accepted, as are a wide variety of prepaid gift cards, which brings a whole new level of anonymity to their payment system.
Privacy, logging, and encryption
The USA isn’t a perfect home for a VPN company, as sharing that home with the CIA and NSA could potentially lead to subpoenas, warrants, and gagging orders. PIA, however, gets around this issues by having a strict zero logs policy.
PIA doesn’t collect logs of any kind, and has never been on the wrong end of a privacy leak.
As for encryption, PIA is one of the strongest VPNs available. There are many VPN protocols to choose from, including OpenVPN, PPTP, L2TP, and IPSec, although we only recommend using OpenVPN whenever possible.
PIA’s OpenVPN encryption uses AES-256, SHA256, and RSA4096. This is impressive, and extremely secure.
Servers
PIA has over 3028 servers in 25 countries, and continues to grow steadily. Although not the most offered by any VPN service, it is plenty for those wishing to protect their privacy and mask their location.
How to set up PIA on a Sabai Router
OpenVPN
Go to www.PrivateInternetAccess.com and click on DOWNLOAD

Scroll down to the View OpenVPN Configurations link

Click on OpenVPN Configuration Files (Recommended Default) for use with a Sabai OS router.
Click on OpenVPN Configuration Files (IP) for use with a VPN Accelerator.
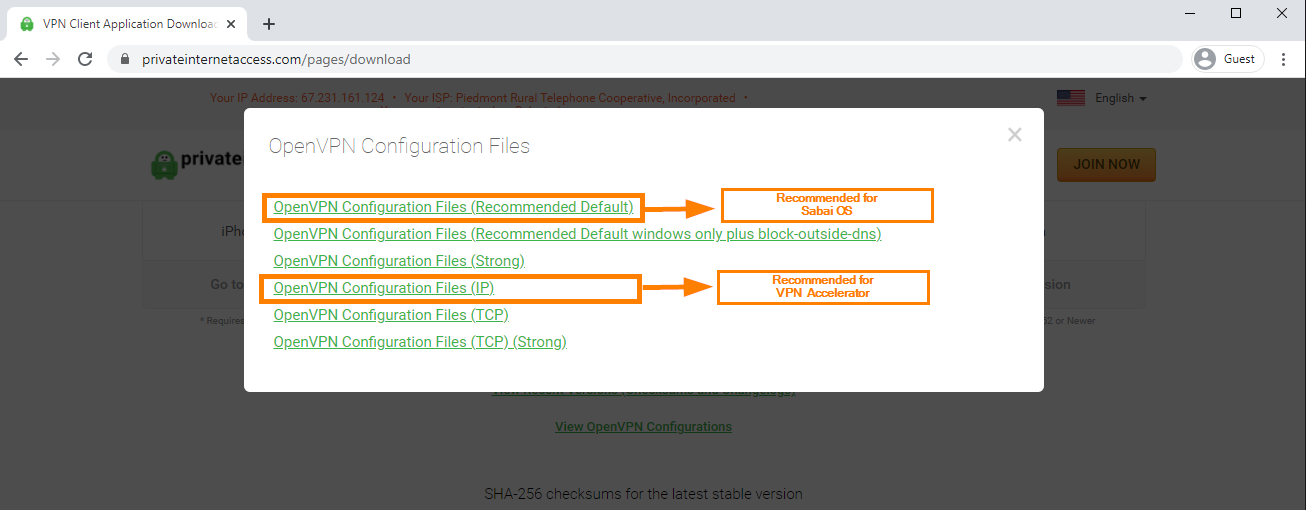
A zip file will download to your computer. Unzip this file to a location you can find later.
Please make sure you are connected to the Sabai router before continuing setup. Connect using either wire or wireless.
Default Wireless connection is
SSID: Sabai24
Password: sabaipass123
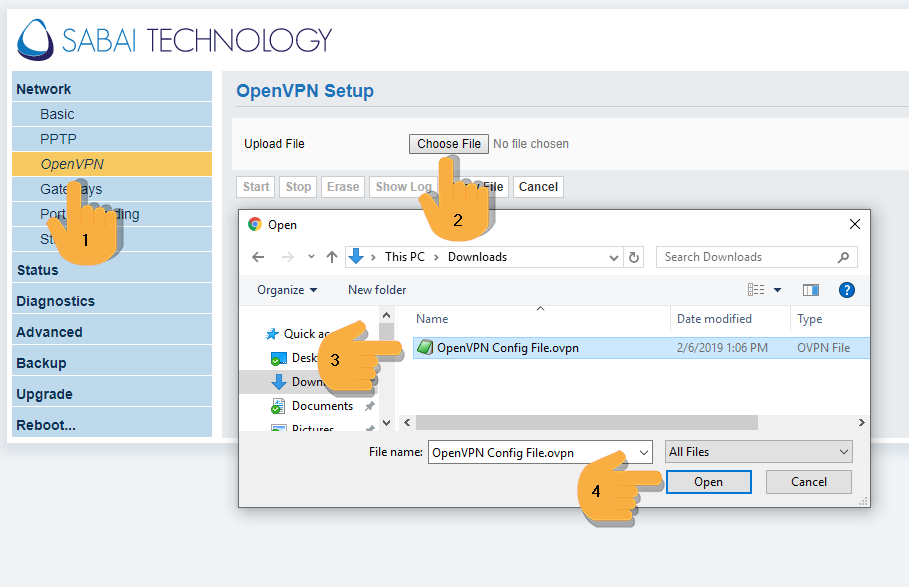
Open a new web browser tab and enter 192.168.199.1 in the address bar and log in to your Sabai VPN Router. The default login is admin and sabaipass123.
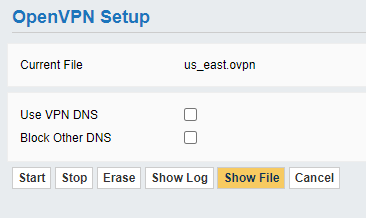
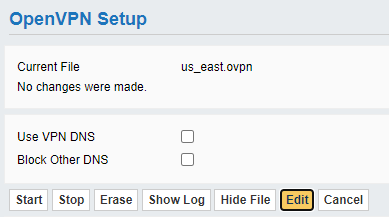
Click on Network then OpenVPN and browse to the file you downloaded earlier and click Open. The file will load into your router. Click Show File, Edit and enter the VPN Account Login and Password in the provided boxes.
Click Show File.
Click edit.
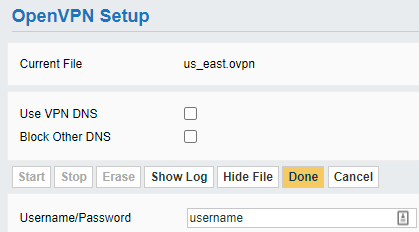
Enter your Private Internet Access account username and account password.
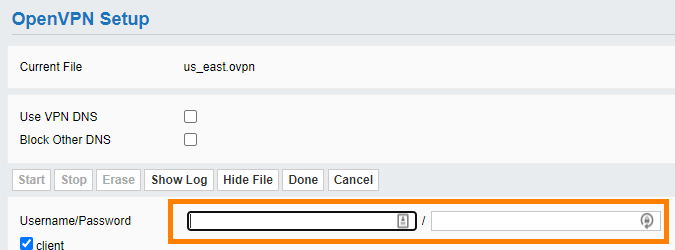
Click DONE. Click SAVE.
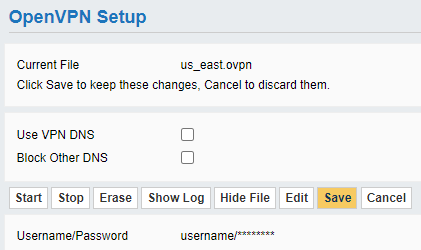
Then click Start to begin the VPN Service.
Check the top right corner for location and connection status of the VPN.
Your basic OpenVPN setup is complete.
How to set up PIA on a Sabai VPN Accelerator
Enter 192.168.199.2 in the address bar and log in to your Sabai VPN Accelerator. The default login is admin and sabaipass123.
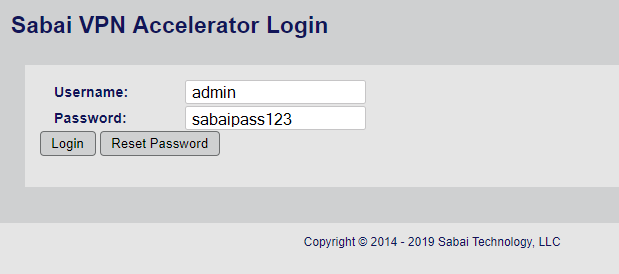
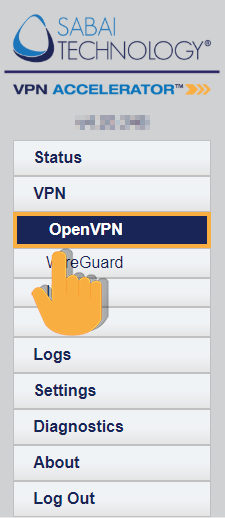
Click on the OpenVPN menu
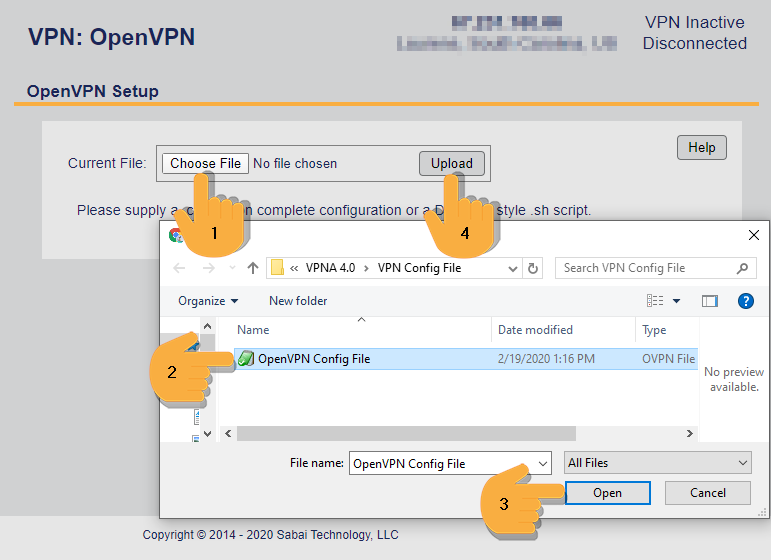
Click Choose File.
Find the .OVPN file you downloaded from Private Internet Access
Click Open
Click Upload
Click Edit Config.
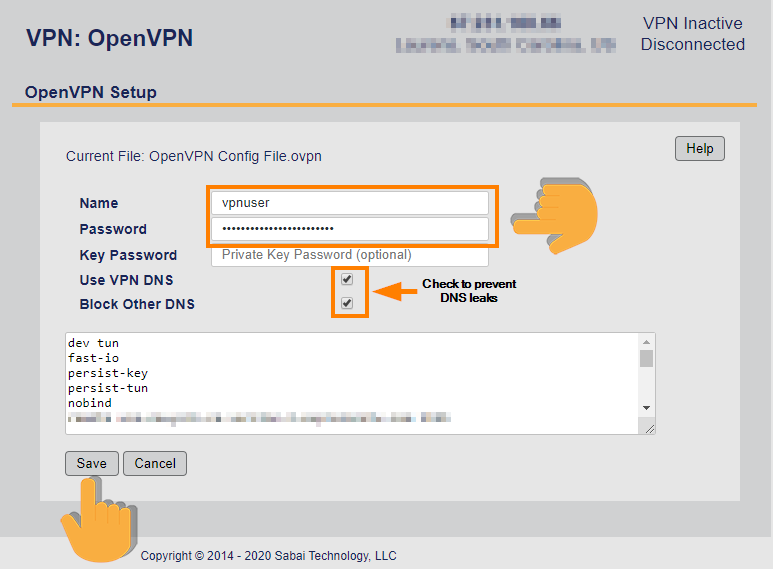
Enter your Username and Password information in the provided boxes.
Click Save
Click Start
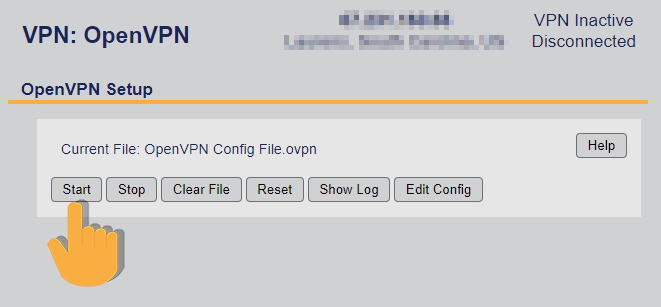
Clear or Reset and then repeat this process to load a new file or VPN Server location.

VPN Status will show in the top right corner

Congrats! Your VPN Accelerator OpenVPN setup is complete.
Gateways
Now that you have your router connected to Private Internet Access, it’s time to have a look at one of our most famous features - Gateways. This technology is exclusive to Sabai OS and allows you to choose which devices connecting to your router go through the VPN, and which connect directly to your regular internet.
This allows you to have different devices simultaneously connected to different networks, so you can be gaming on your local connection, whilst watching geo-restricted content through the VPN.
Head over to our setup guide to see how.
