My Expat Network
![]()
My expat network is a VPN provider aimed squarely at the expat community. This makes it perfect for those who want to stream content from abroad, but less secure than some of the hardcore privacy focused VPNs.
They have excellent support that consists of an FAQ, help center with an active forum, troubleshooting guides, etc, as well as a support ticket system with well trained staff that reply quickly.
My Expat Network integrates seamlessly with Sabai OS.
My Expat Network pricing and Packages
Being aimed at the expat market, the service has the option to unblock content from one of nine European countries plus the USA, Canada, or Australia, from around $5.50 per month if you sign up for a year, or $8 for all available countries.
Logging, security, and privacy
My Expat Network uses OpenVPN with 128-bit encryption for PC, Mac, and routers, and L2TP for mobiles.
This level of encryption might seem low to privacy enthusiasts worried about being spied on by the CIA, but most people who simply want to mask their IP to get around geo-content blocks are well catered for, as the lower encryption allows for faster content delivery.
They do keep logs of basic connection details and bandwidth, so again, anyone who needs to use a privacy system in a place where government snooping is an issue may want to look elsewhere. The name does suggest, of course, that the service is aimed at people wanting to stream content from their home country whilst abroad.
Server locations
As mentioned above, My Expat Network allows users to either pay for a single location, or to all available ones.
The locations are:
-
Australia
-
Canada
-
Germany
-
Denmark
-
Spain
-
France
-
Italy
-
Netherlands
-
Norway
-
Sweden
-
UK
-
USA
My Expat Network Setup on a Sabai OS router
OpenVPN
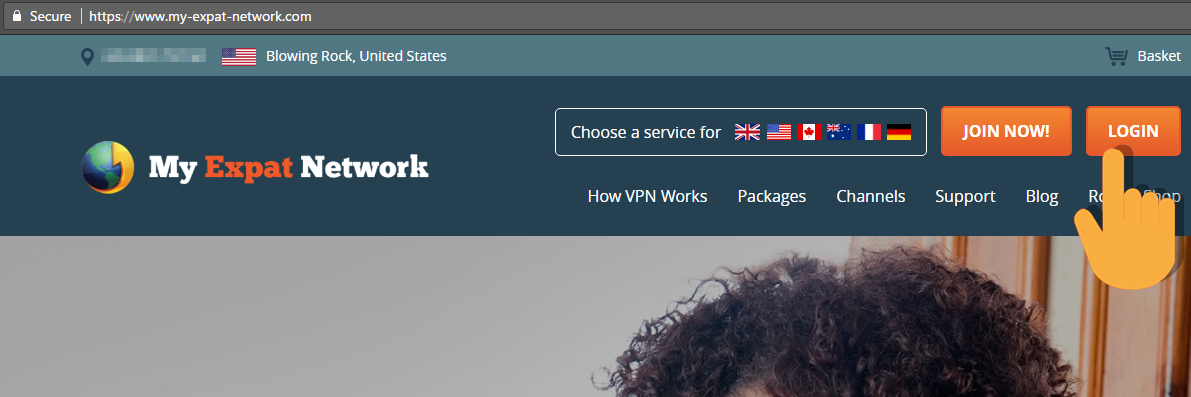
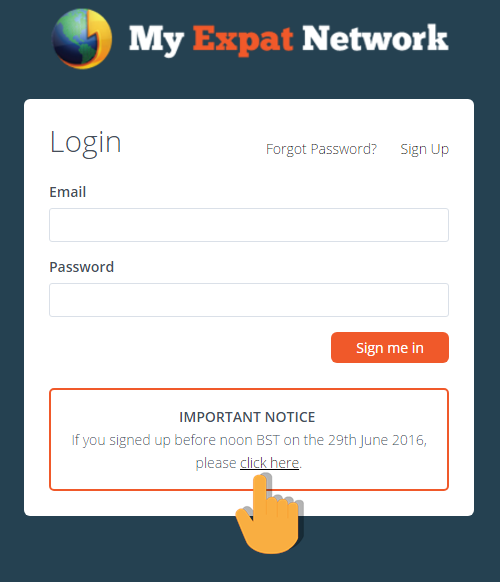
Acccess your account at www.My-Expat-Network.com
Click on the login button in the top right-hand corner.
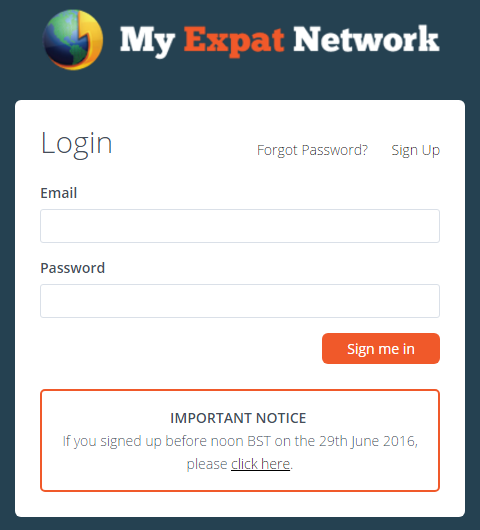
Login option 1:
If your account was opened after Jun 29th, 2016 please enter your email address and password and click "Sign me in".
(See Login option 2 if signed up prior to June 28th, 2016)
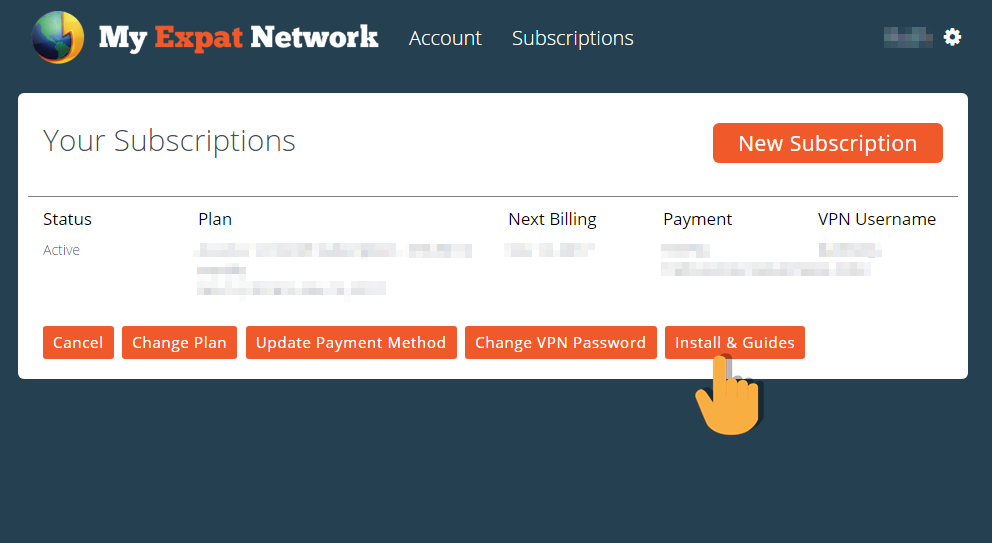
Click the button "Install & Guides"
Click the Sabai VPN Router button
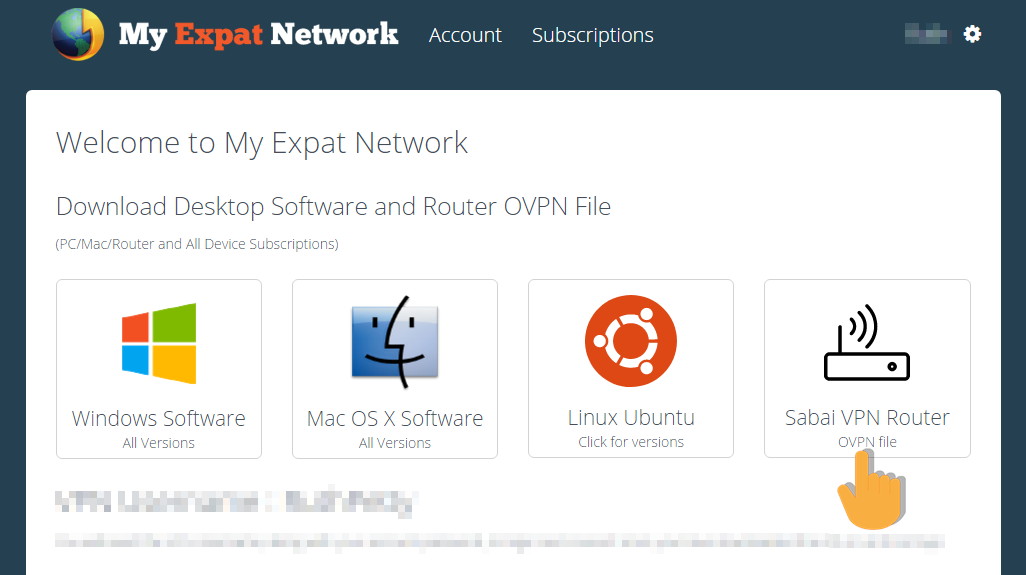
The .ovpn file or .zip folder will automatically download to your computer. Save where you can find it later.
Login option 2:
If your account was opened before June 29th, 2016 please click on the "click here" link in the IMPORTANT NOTICE box.
Scroll down to where you see this window and enter your My Expat Network username and password. (this information is found in your PayPal receipt)
Choose the download type "Sabai Technology Routers (OVPN File)".
Click Install
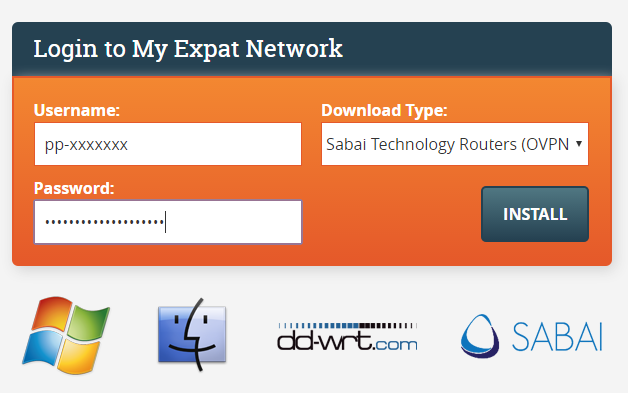
The .ovpn file or .zip folder will automatically download to your computer. Save where you can find it later.

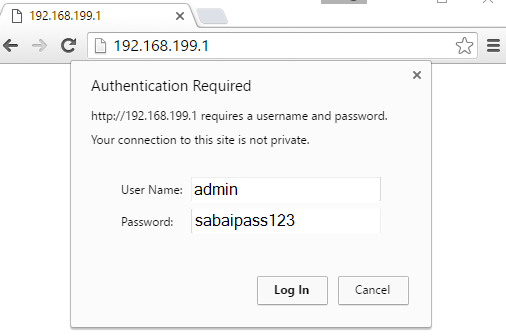
Please make sure you are connected to the Sabai router before attempting setup. Connect using either wired or wireless.
Open a web browser

Enter 192.168.199.1 in the address bar and log in to your Sabai VPN Router. The default login is admin and sabaipass123.
Your Sabai Technology VPN router needs to have Sabai OS version 712 or later installed. Firmware version is found in the top right corner of most pages.
Firmware updates can be requested here.
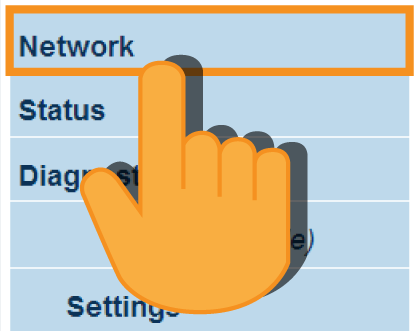
Click on the Network menu
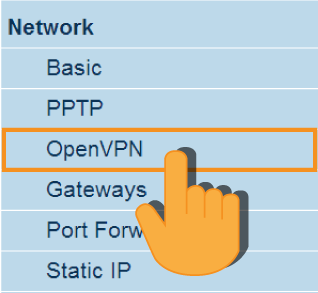
Click on the OpenVPN menu
Click the Choose File/Browse button
Find the .OVPN file and click open

Check both boxes and then click Start

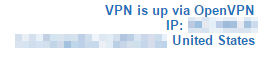
Setup is complete, check the top right-hand corner for location and connection status of the VPN.
=
For assistance with setup please contact us at support@sabaitechnology.com.
Our office hours are Monday through Friday, 8:00am to 6:00pm EDT/EST.
Next Setup step: Gateways